The UNAVCO IDV displays earthquake focal mechanisms. Symbols available include the seismic focal mechanism "beachball," the P and T axes, and the slip direction. You can make map views, or 3D displays with depth in any vertical scale.
For the IDV data file format for earthquake focal mechanisms, see Earthquake Hypocentral and Focal Mechanism Data Format for the IDV.
In the IDV there are two kinds of focal mechanism "beachballs" since the IDV is a 3D display tool which can show symbols in 3D from any viewpoint One is the lower half of the beachball, which in map view makes the conventional focal mechanism symbol. There is also a full beachball symbol(sphere), which is useful in some cases. There are red and dark blue beachballs. The IDV is fully interactive, with true 3D displays. You can rotate, zoom, and pan the display, scale plot symbols to any size, change map projections, and include many other types of data in one display.
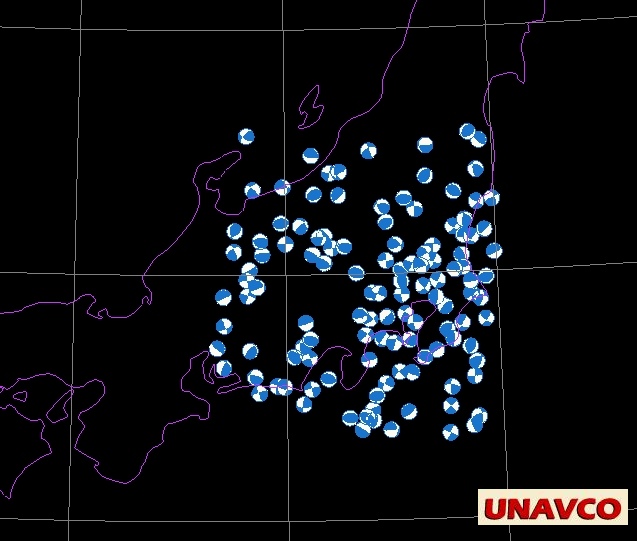
UNAVCO IDV focal mechanism displays. Click for full size.
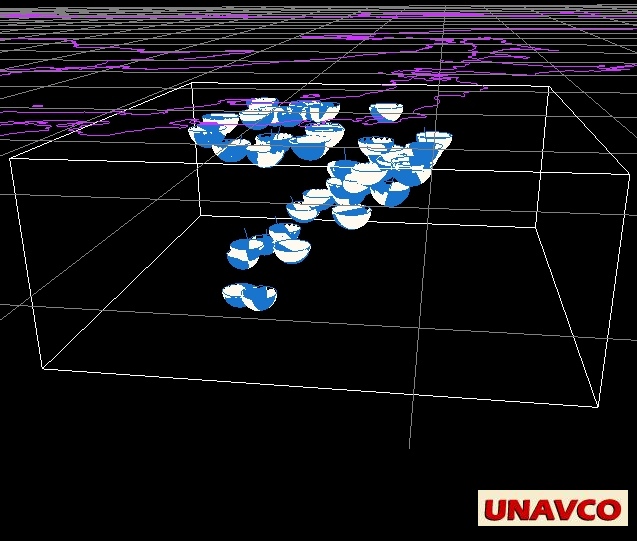
Focal mechanism data courtesy of Francis Wu. The depth of the 3D wireframe box is 350 km in this case.
![]()
![]()
The two displays above show an IDV transect box in map view, and the transect box contents on the right.
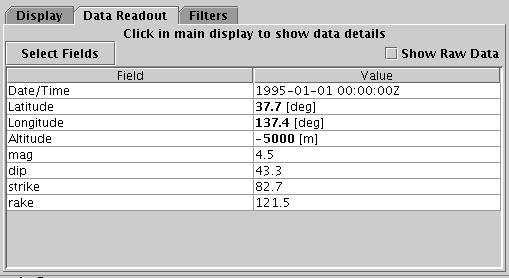
You can get a numerical data readout for each focal mechanism, when you click on the focal mechanism symbol in the IDV display:
Types of IDV Focal Mechanism Symbols

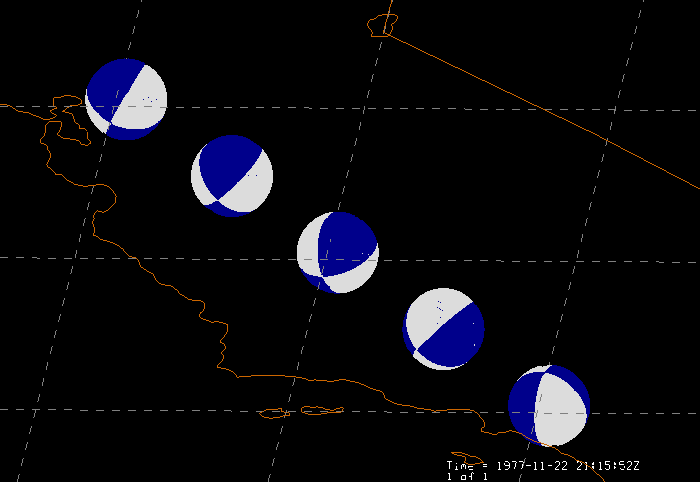
The five focal mechanisms plotted with beachballs (lower half), P and T axes (gray and blue,) and the slip direction (green).
Oblique view from south. Click for larger size.
Full beachball plot (sphere), of the same sources.
Oblique view from SSE. Click for larger size.

P and T axes (gray and blue); slip directions (green), of the same sources.
Oblique view from SSE. Click for larger size.
Focal Mechanism Data Sources
Global CMT Project Focal Mechanism Data
See Global CMT Project and the CMT Catalog Files in their ASCII "ndk" format. The main ndk catalog file catalog has 33872 earthquakes. (Do not use the search at CMT catalog search which does not return hypocentral data in any format easy to use in a computer).
Sample of GMT data formatted for IDV use: 259 western U.S. GMT focal mechanism solutions in IDV csv point data format.
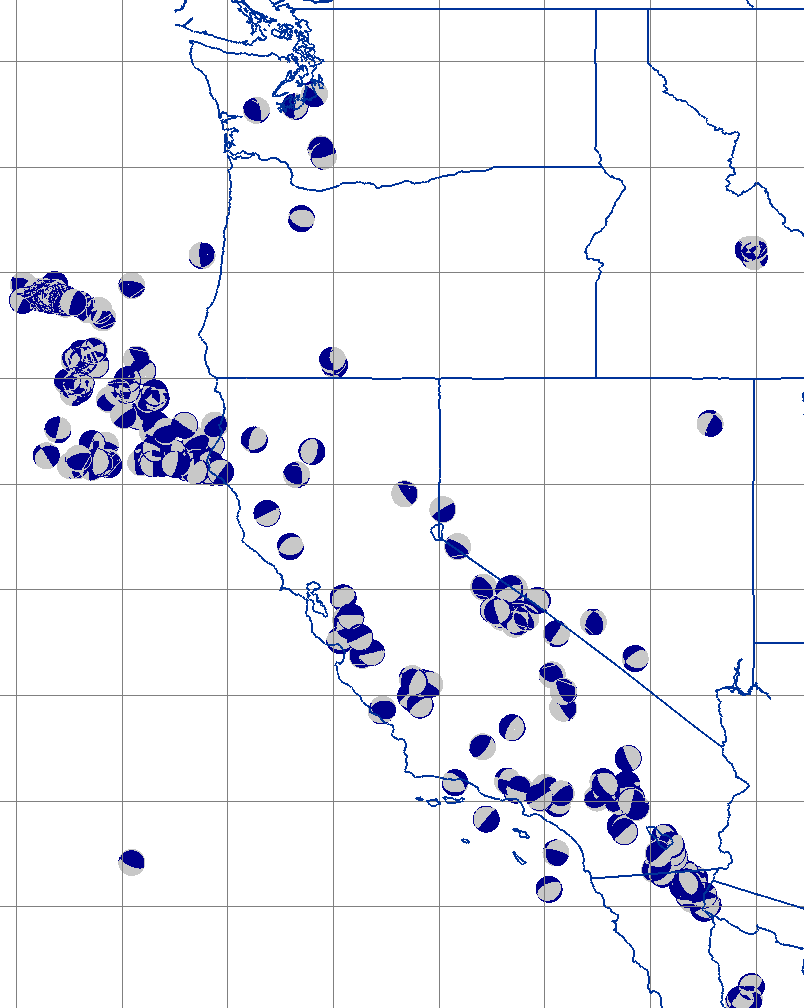
IDV display of 259 GMT focal mechanisms of western U.S. earthquakes. Click for full size.
Data from GMT's catalog in NDK format, http://www.ldeo.columbia.edu/~gcmt/projects/CMT/catalog/jan76_dec10.ndk, was converted by UNAVCO to IDV "csv" format. Note that the csv file for this data has both mb and Ms. There is no limit on the number of decimal digits in any number in this format. Columns are not aligned vertically.
For IDV use, you can save the csv file of 110 California earthquakes and read it with the IDV, or directly enter the URL of the above link to the csv data file into the IDV's Data Chooser URLs window. Be sure to choose Data Source Type - > Text Point Data Files in the IDV Dashboard window, Data Choosers tab, URLS section. Then click Add Source, and do a Point Data plot. See more below about IDV controls. With this data file you can plot focal mechanisms, hypocenters, hypocenters colored by magnitude, and hypocenters colored by depth, in the IDV.
A Python program to convert the Global CMT Project NDK-format data to IDV file is here. Read the header of the program to see how to use it. You need the Python interpreter for your computer; on Linux type "which python" to see if you have it. Python is online at www.python.org. This program only extracts the hypocentral location, time, mb, Ms, strike, dip, and rake. It can be modiifed to extract additional moment tensor values.
You will need the NDK file of Global CMT Project data, from the CMT catalog at http://www.globalcmt.org/CMTfiles.html, called jan76_dec10.ndk. It is 13 MB in size. That file has all GMT solutions of events for 1976-2010, and more recent data may be found on that web page, by month.
European-Mediterranean Regional Centroid Moment Tensors (RCMT)
online data source: European-Mediterranean Regional Centroid Moment Tensors
Northern California Earthquake Data Center (NCEDC), a joint project of the University of California Berkeley Seismological Laboratory (BSL) and the United States Geological Survey (USGS).
NCEDC Moment Tensor Catalog
online data source: The Northern California Earthquake Data Center (NCEDC) moment tensor Catalog for events in northern and central California and notable earthquakes in the western United States.
Making Displays
This is not a complete description of how to use the IDV. See the UNAVCO IDV User Guide and Unidata's Integrated Data Viewer guide.
First set the display to a vertical scale suitable for your data. Then set a map projection (map area) suitable for your data, or just check the box for the the menu choice Projections->Auto-set projection.
Connect to a data source with the Dashboard window, Data Choosers tab:
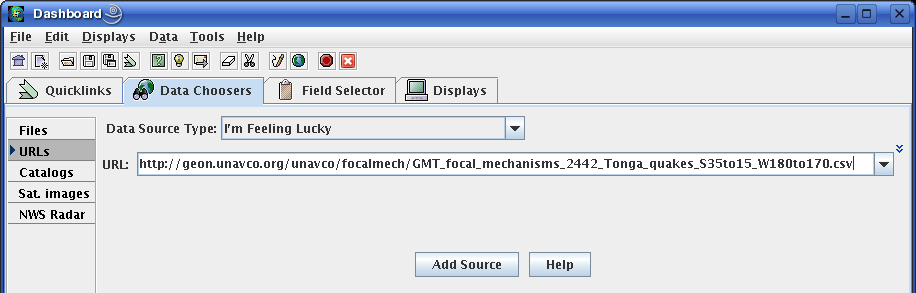
For data sources with an HTTP server (with a URL), use section "URLs." If your data format is an ASCII .csv file like the data files listed above, For local files choose the "Files" section, and navigate to the file on your local disk, After you have the data file indicated, click the "Add source" button.
After you connect to the data source, the Dashboard shows the Field Selector for that data:
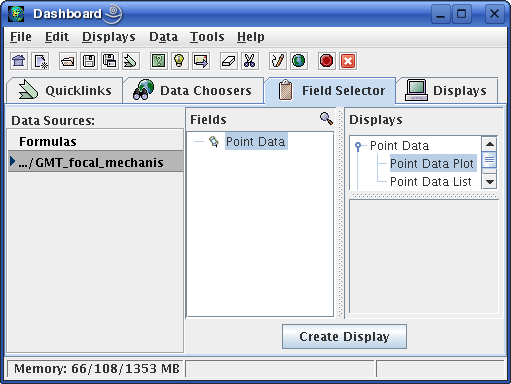
To make a display for a Field (parameter) type, first click on a display type in the Displays panel of the same window, and then click on the "Create Display" button.
Focal mechanism data has Field type "Point Data," and the Displays panel shows the choice "Point Data Plot" and "Point Data List." Click on "Point Data Plot", then click on the "Create Display" button.
When a display is made the Dashboard shows the "display control" panel for that display:
One plot symbol is on the map, for the first time.
You may be asked if you really want to display a large number of data points:
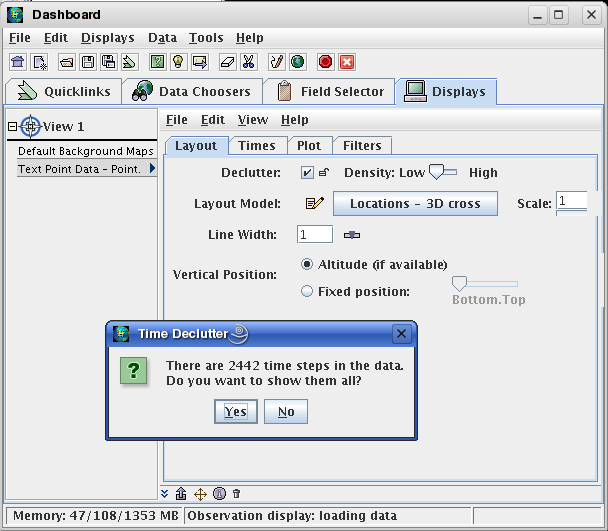
Generally the IDV can several hundred focal mechanisms with reasonable response;
the more the sources the slower the response.
In the display control, click on the Times tab:
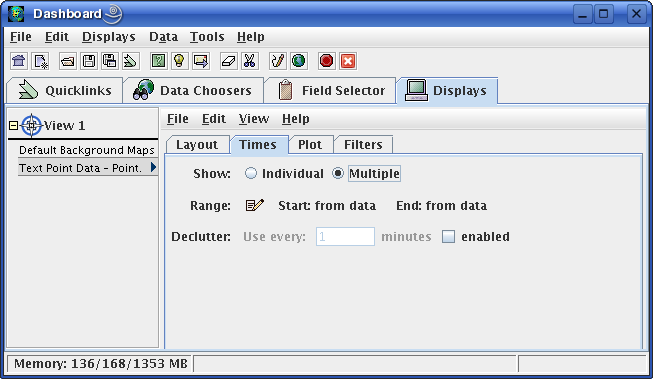
Click on the Multiple button; otherwise there will be many displays, one for each data time. Like 500 displays!
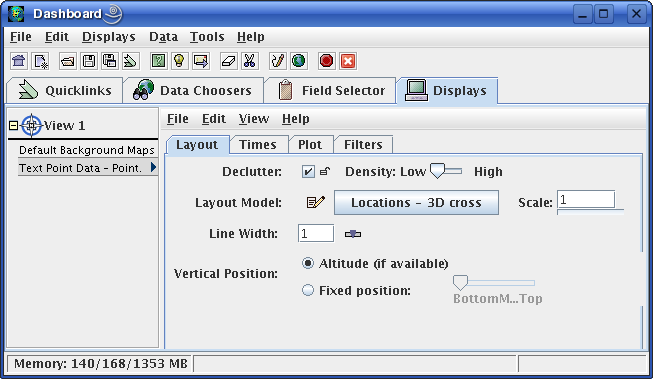
In the Layout tab,
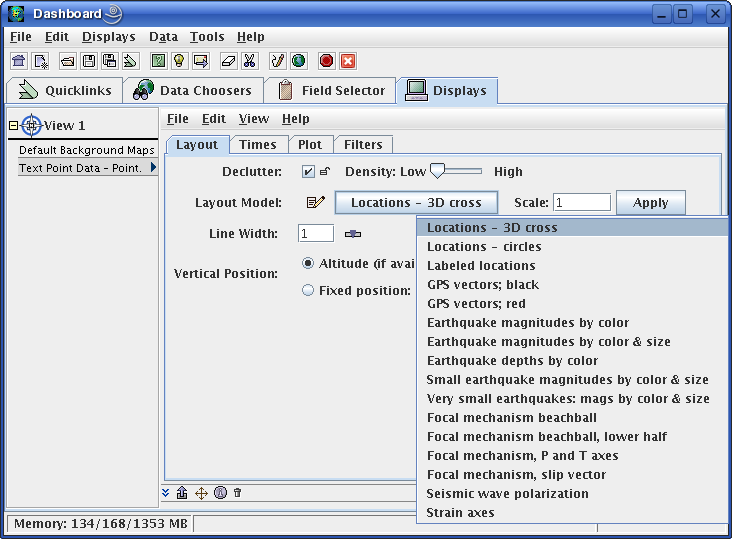
check OFF the Declutter box,
or slide the Density slider towards High, to see more events. Declutter off means show all events
if all times are allowed.
In the "display control" panel for the display, note the pull down menu called Layout Model which has a list of the plot symbols available for all kinds of point data. At first a Point Data Plot display will use plot symbols called "Locations 3D Cross," or whatever happens to be first in the "Layout Model" list. To use another plot symbol, choose one from the pull-down menu, such as Focal Mechanism beachball, lower half. Conventional focal mechanism symbols in publications usually are overhead map views showing the lower half of the focal mechanism "beachball." Since the IDV is a true 3D system, you can see data from any viewpoint.
After January 2011 there are red symbols as well as blue available as choices in the Layout Model entry area. The colors cannot be changed by the Layout Manager.
You may also plot the "Focal mechanism beachball, full sphere," P and T axes, or the slip direction. You can make all three plots for each focal mechanism at the same time.
After you see the plotted data you may wish to enlarge the symbol with the Scale entry box in the display control in the Dashboard window. You also can thicken lines in plot symbols with the Line Width entry box. Beachballs often look better with a Scale of 2 or 4 and a line with from 2 to 3.
To zoom, pan, and rotate see Zoom, pan and rotate.
To make a transect display, see
Transect View.
A Transect View is a vertical cross section at any azimuth with
preset end locations, depth and thickness.
For use of point data symbols, read more about Point data plots and Working with the Point data Plot Symbols using "Layouts Models".