The installation process is fast, if all goes normally. The IDV runs on Windows, Mac, Linux, and Solaris.
See Unidata's IDV System Requirements.
First you install Unidata's IDV, which is the core code for all versions of the IDV. Go to the web site with the Unidata IDV Installers. Download and run the IDV Installer program file for your system (Windows, Mac, Linux, or Solaris).
If required, next install the UNAVCO IDV plugin. The UNAVCO IDV plugin adds additional data types and displays for solid earth geophysics, to the Unidata IDV.
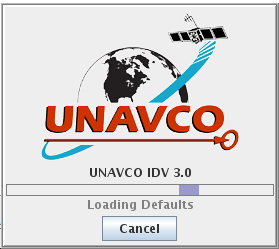
If you installed the UNAVCO IDV plugin in a earlier version of the IDV, installing an updated IDV version will usually pick up the plugin without doing anything extra. The UNAVCO IDV plugin logos appears at start-up.
If you never installed the UNAVCO IDV plugin, restart your new IDV with this command:
./runIDV -installplugin http://www.unavco.org/software/visualization/idv/unavcoidv.jar
To only use the UNAVCO IDV plugin once, run the IDV with this command:
./runIDV -plugin http://www.unavco.org/software/visualization/idv/unavcoidv.jar
You will see the UNAVCO IDV logo during start-up when the UNAVCO IDV plugin is in use, with the IDV version number:

The UNAVCO IDV comprises the Unidata IDV, plus the UNAVCO IDV Java "plugin."
There are two steps to install the UNAVCO IDV on your computer:
First you install Unidata's IDV, which is the core code for all versions of the IDV. To get the Unidata IDV first register with Unidata. This is free and useful. Unidata provides free IDV user support for registered Unidata users. Unidata is part of UCAR the top atmospheric research facility in the U.S. Use Unidata user registration.
Go to the web site with the Unidata IDV Installers.
Download the "IDV Installer" program file for your system (Windows, Mac, Linux, or Solaris).
For Vista Windows, first create a new folder in your own area, not in "Program Files," and install the IDV in that new folder. For Vista Windows systems, you may not be allowed to make a necessary change in the file runIDV.bat for an IDV installed under the "Program Files" folder, unless you have full administrator privileges. You can install the IDV there, but regular users will not be able to adjust how much memory the IDV uses (step 3, below).
Run the installer program, and start the IDV:
On some Windows systems the "open" option with download will run the installer as soon as it is downloaded.
Running the installer, you first will see a new window titled "Welcome to the Integrated Data Viewer Setup Wizard." Follow the steps there. On Vista systems remember to install the IDV in the new folder you made. Otherwise you can just accept what the installer suggests.
If you installed the IDV before, you will recover most or all of your existing IDV setup.
Helpful hints: On Windows accept the option to create a desktop icon. On a Vista system, install in your own area, not in "Program Files."
On Linux, if the installer suggests putting the links in /usr/bin, choose instead your home directory to avoid system privilege problems, and when the installer says "The application may be launched by executing the installed start scripts" that means in the directory you installed to, you run the IDV with "./runIDV" or "./IDV" or simply type "IDV" in your home directory, or wherever you put the links.
IDV plugins have additional code that extend the base Unidata (meteorological) IDV, to ad additional data types and displays. The UNAVCO IDV plugin adds features useful with solid earth data and displays.
If you installed the UNAVCO IDV plugin in a earlier version of the IDV, installing an updated IDV version will usually pick up the plugin without doing anything extra. The UNAVCO IDV plugin logos appears at start-up.
If you never installed the UNAVCO IDV plugin, restart your new IDV with this command:
./runIDV -installplugin http://www.unavco.org/software/visualization/idv/unavcoidv.jar
To only use the UNAVCO IDV plugin once, run the IDV with this command:
./runIDV -plugin http://www.unavco.org/software/visualization/idv/unavcoidv.jar
You will see the UNAVCO IDV logo during start-up when the UNAVCO IDV plugin is in use.
If you have trouble getting the plugin to install, you may have a local firewall blocking download requests from the IDV, or Windows Vista can prevent writing files into the \Program Files\ folders. Get the actual plugin file from the URL above, and install that as a local file for the plugin. To install a local file as a plugin, see IDV Plugins from the Unidata IDV user guide ( http://www.unidata.ucar.edu/software/visualization/idv/docs/userguide/misc/Plugins.html ).
If you only see a smaller "IDV" logo without UNAVCO, the UNAVCO plugin is not installed.
To learn to use the IDV, see the UNAVCO IDV User Guide, the Unidata IDV user guide, or attend an IDV workshop at Unidata in Boulder. Or look at the IDV Data Types to see what you can do.